Exterior Infrastructure Repair: Maintaining Integrity with the Vinyl Siding Patch
September 20, 2026
No Comments
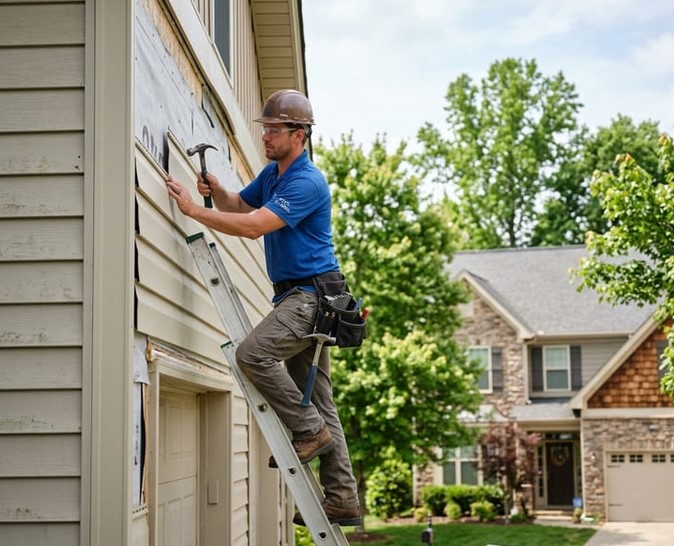
Source:https://sturdysidinghuntersville.com
Last spring, I got a frantic call from a homeowner who had just noticed a gaping 3-inch hole near the base of his home’s exterior wall. A stray rock flung by a high-powered lawnmower had punctured the vinyl panel, exposing the bare weather-resistive barrier behind it. With a major rainstorm forecasted for that weekend, the owner was convinced he was facing a full $5,000 elevation teardown.
I told him to put his wallet away. We drove over, grabbed a spare piece of matching profile siding, and performed a seamless structural repair in under 45 minutes for less than $15 in materials.
In my ten-plus years of residential exterior restorations, I have seen tiny punctures, stress cracks, and impact holes left unaddressed because homeowners assume siding repairs require massive contractor fees. The truth is, mastering a professional-grade vinyl siding patch is one of the most cost-effective maintenance skills you can acquire. It halts water intrusion instantly, keeps pests out of your wall cavities, and preserves your home’s structural envelope without breaking the bank.
The Hidden Danger of Unsealed Exterior Breaches
To understand why a simple puncture is dangerous, you have to look at how vinyl siding systems operate. Vinyl is designed as a rainscreen—a protective outer skin that sheds the vast majority of wind-driven water, UV radiation, and physical impacts away from your underlying wall assembly.
Think of an unpatched siding hole like a missing shingle on your roof during a thunderstorm. While the waterproof underlayment beneath might catch water briefly, continuous exposure to moisture, wind pressure, and humidity guarantees that water will eventually seep into your wall framing.
+-------------------------------------------------------------+
|                 SIDING PUNCTURE RISK CASCADE                |
+-------------------------------------------------------------+
| Unsealed Hole ──► Wind-Driven Moisture ──► Wet Sheathing    |
| (Outer Skin)      (Infiltration Zone)     (Rot & Mold)      |
|                                                  │          |
|                                                  ▼          |
|                                          STRUCTURAL DECAY!  |
+-------------------------------------------------------------+
Once moisture penetrates past the weather-resistive barrier (such as Housewrap or asphalt felt), it reaches OSB wall sheathing, fiberglass insulation, and structural studs. Over time, trapped moisture breeds toxic black mold, rots wall framing, and invites wood-boring insects into your living spaces.
Thermal Expansion Dynamics: Why Patch Chemistry Matters
Polyvinyl chloride (PVC)—the primary compound in vinyl siding—is a thermoplastic material that expands and contracts significantly with ambient outdoor temperature swings.
Understanding thermal movement is critical. If you fasten a rigid patch rigidly with permanent adhesive across two dynamic panels, seasonal expansion forces will buckle the vinyl, pop the seam open, or tear new stress cracks around the repair.
       [ THERMAL MOVEMENT PROFILE (PVC) ]
                       │
        ┌──────────────┴──────────────┐
        ▼                             ▼
[ Summer Heat Expansion ]    [ Winter Cold Contraction ]
        │                             │
        ▼                             ▼
 Material Grows Lengthwise    Material Shrinks & Hardens
 (Requires Floating Joints)   (Brittle, Impact-Sensitive)
The Siding Lock Mechanism
Vinyl panels do not sit flat against a wall; they interlock along horizontal seams using a curved lower hook (the buttlock) and a top nail hem. A successful vinyl siding patch must respect this floating mechanical connection to accommodate thermal expansion while maintaining a water-tight seal.
Choosing Your Repair Method: Patch vs. Partial Replacement
Depending on the size and location of the damage, you have two professional repair approaches available.
+-------------------------------------------------------------+
|               REPAIR STRATEGY DECISION MATRIX               |
+-------------------------------------------------------------+
| Damage Severity   | Recommended Repair  | Skill Level Needed|
+-------------------+---------------------+-------------------+
| Small Hole (< 1") | Structural Caulk /  | Beginner          |
|                   | Vinyl Adhesive      |                   |
| Mid-Size (1"– 6") | Overlay Patching    | Intermediate      |
| Large / Cracks    | Full Section Swap   | Intermediate      |
| (> 6" Length)     | (Siding Zip Tool)   |                   |
+-------------------+---------------------+-------------------+
1. Small Puncture Repair (Caulk & Adhesive)
For small drill holes or tiny rock punctures under 1 inch in diameter, filling the void using color-matched, exterior-grade structural polyurethane or silicone adhesive creates a fast, durable barrier.
2. Overlay Patching
For medium-sized impact holes (1 to 6 inches), cutting a donor section from matching vinyl siding creates an overlapping “shingle” patch that sheds water naturally down the wall face without replacing entire 12-foot courses.
Step-by-Step Blueprint for a Seamless Vinyl Siding Patch
When executing an overlay patch, precision cutting and surface preparation ensure the repair blends invisibly with surrounding panels.
+-------------------------------------------------------------+
|                  PATCH INSTALLATION WORKFLOW                |
+-------------------------------------------------------------+
| [ STEP 1 ] Clean Substrate & Inspect Underlayment Barrier   |
| [ STEP 2 ] Trim Donor Section (Extend 2" Beyond Damage)     |
| [ STEP 3 ] Remove Top Nail Hem from Donor Piece             |
| [ STEP 4 ] Lock Bottom Hook & Bond with Polyurethane Adhesive|
+-------------------------------------------------------------+
-
Clean the Damaged Area: Thoroughly scrub the surrounding siding surface using isopropyl alcohol or a mild degreaser to remove dirt, oxidation, and chalky UV buildup.
-
Prep the Donor Material: Cut a donor piece from matching siding stock (or from an inconspicuous spot in your garage attic) that extends at least 2 inches beyond the damage on all sides.
-
Remove the Nail Hem: Snip off the top perforated nailing flange from your donor patch using aviation snips. Leave the curved bottom hook intact so it can latch securely onto the lower siding panel below the hole.
-
Apply Flexible Sealant and Set: Apply a continuous bead of high-performance exterior polyurethane sealant around the back perimeter of the donor piece. Snap the bottom hook of your donor patch into the existing panel’s bottom lock, then press the patch firmly against the damaged wall until the adhesive bonds completely.
Pro Tip: If you struggle to match faded exterior siding colors, source a donor piece from a hidden section of your home, such as behind an outdoor air conditioning unit or inside a back shed cavity. Install a new panel in that unseen area and use the weathered original piece for your highly visible front-wall patch to achieve a perfect color match.
Hidden Warning: Avoid executing vinyl siding repairs in freezing temperatures below 40°F (4°C). Cold PVC becomes extremely brittle, causing panels to split or crack when cut with snips or flexed during installation. Always work on warm, sunny days or use a heat gun on low settings to carefully warm the vinyl before cutting.
Long-Term Exterior Maintenance Strategies
Once your repair is complete, establishing a routine exterior maintenance checklist protects your home’s envelope against future impact damage.
-
Trim Nearby Trees: Keep tree branches and heavy shrubbery trimmed back at least 3 feet from your siding to prevent wind-driven scratching and moisture retention.
-
Mower Discharge Direction: Always point lawnmower discharge chutes away from the home when cutting grass to avoid slinging rocks into lower siding courses.
-
Routine Inspections: Walk your home’s perimeter twice a year—every spring and fall—to inspect lower courses for impact damage, loose seams, or failing caulking.
Protecting Your Home’s First Line of Defense
Maintaining your home’s exterior integrity doesn’t always require massive financial investments or complete wall overhauls. Mastering the straightforward execution of a vinyl siding patch gives you the confidence to repair unexpected damage quickly, keeping water, weather, and pests safely outside where they belong.
Have you ever dealt with punctured or cracked vinyl siding on your home? How did you handle the repair, or are you currently facing a damage spot that needs fixing? Share your questions, experiences, or project tips in the comments section below!