External Hardware Uniformity: Modernizing Access with the Storm Door Handle
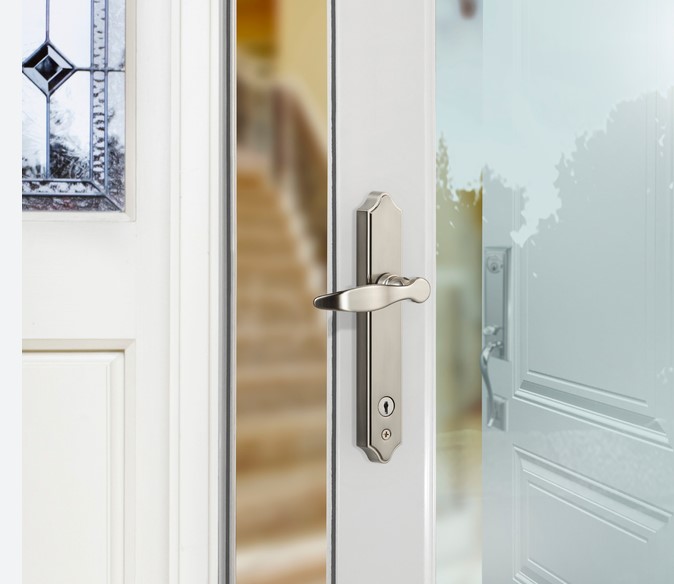
Source:https://assets.1.commercebuild.com
I recently visited a client who had just spent over $4,000 upgrading her front entryway with a solid mahogany door, matte black architectural hardware, and sleek smart locks. But as I walked up the porch steps, the first thing my eye caught wasn’t the stunning wood grain or the smart keypad—it was a pitted, discolored, 20-year-old plastic push-button latch dangling off her glass storm door.
Every time she wanted to enter her home, she had to awkwardly jiggle a flimsy, sticking lever that felt like it was going to snap off in her hand. It was the architectural equivalent of wearing a tailored tuxedo with beaten-up, muddy running shoes.
We replaced that outdated latch with a heavy-duty, modern lever-style storm door handle set that matched her primary entry door’s matte black finish. In my over ten years of hands-on entry door installations, weatherization projects, and hardware retrofits, I have found that homeowners frequently overlook the storm door. Yet, because it sits on the outermost plane of your house, it is the absolute first physical point of contact for anyone entering your home.
The Mechanics of Entry Systems: Why Storm Door Hardware Differs
To understand why you cannot simply slap a standard interior or exterior door knob onto a storm door, you have to examine frame thickness and latch mechanics. Primary entry doors are typically 1-3/4 inches thick and house deep mortise locks or cylindrical deadbolts.
Think of a primary front door like a heavy vault door designed for security and insulation. A storm door, by contrast, acts like a protective shield designed to take the brunt of wind, rain, and solar heat while managing air exchange. Because storm doors feature slim aluminum or vinyl frames (usually only 1 inch to 1-1/2 inches thick), a storm door handle must utilize a specialized surface-mount or narrow-profile mortise mechanism that fits within tight glass-frame tolerances.
       PRIMARY ENTRY DOOR                       STORM DOOR HARDWARE
  (Thick Frame, Deep Mortise)               (Slim Profile, Surface-Mount)

  +---------------------------+             +---------------------------+
  | Door Thickness: 1-3/4"    |             | Door Thickness: 1" - 1-1/2"|
  | Deep Cylinder Hole (2-1/8"|             | Surface Mount / Narrow Slot|
  | Standard Backset: 2-3/8"  |             | Surface Catch / Edge Latch|
  +---------------------------+             +---------------------------+
Surface-Latch vs. Mortise Latch Mechanisms
-
Surface-Mounted Push-Button Latches: Common on builder-grade doors. The handle mounts flat on the door face, and a spring-loaded strike nose catches an exterior jam bracket on the frame.
-
Integrated Mortise Handle Sets: Found on premium storm doors. The entire latch mechanism sits inside a concealed pocket cut directly into the slim aluminum door edge, offering a flush, high-end appearance that mimics primary door hardware.
Deciphering Hardware Styles: Push-Button vs. Modern Lever Sets
Upgrading your hardware is the fastest way to bridge the gap between functional weather protection and modern curb appeal.
+--------------------------------------------------------------------------+
|                      STORM DOOR HANDLE STYLES                            |
|                                                                          |
|   +---------------------------------+  +------------------------------+  |
|   |   TRADITIONAL PUSH-BUTTON       |  |     MODERN LEVERSET / DEADBOLT|  |
|   |  * Rigid exterior button push   |  |  * Ergonomic downward press  |  |
|   |  * Basic internal sliding lock  |  |  * Keyed deadbolt security    |  |
|   |  * Aluminum or plastic casing   |  |  * Solid forged brass/zinc   |  |
|   +---------------------------------+  +------------------------------+  |
+--------------------------------------------------------------------------+
1. Classic Push-Button Latches
Operated by pressing a thumb button on the outside and pushing a paddle lever on the inside. While inexpensive, the internal springs degrade over time, leading to sticking latches that fail to catch when the pneumatic door closer pulls the door shut.
2. High-Style Ergonomic Levers
Features a solid metal horizontal handle that rotates downward naturally. Modern sets often incorporate a matching interior deadbolt lock that operates independently, giving you an extra layer of perimeter security when you leave your main entry door open for ventilation.
Technical Specifications: Backset & Hole Spacing Matrix
Before buying a replacement handle set, measuring your existing door’s mounting footprint is critical to avoid drilling unwanted extra holes in your door frame.
| Hardware Metric | Standard Surface-Mount | Custom Mortise Set | Retrofit Adjustable Set |
| Mounting Hole Spacing | 1-3/4 Inches (Center-to-Center) | Variable Vertical Slot | Universal Sliding Mounting Plate |
| Door Thickness Range | 1 Inch to 1-1/2 Inches | 1-1/4 Inches to 1-1/2 Inches | 1 Inch to 2 Inches (Escutcheon) |
| Backset Distance | 7/8 Inch to 1-1/8 Inches | Flush Edge Mount | Adjustable Surface Alignment |
| Material Composition | Stamped Zinc / Aluminum | Forged Solid Brass / Zinc | Die-Cast Zinc Alloy |
Pro Tip: Always measure the distance between the center of the top screw hole and the center of the bottom screw hole on your existing handle plate. The industry standard for push-button retrofits is 1-3/4 inches, but older custom doors may vary.
Step-by-Step Replacement Protocol
Installing a new storm door handle is a straightforward DIY project that requires only basic hand tools if you follow this field-tested workflow:
+--------------------------------------------------------------------------+
|                     4-STAGE INSTALLATION WORKFLOW                        |
|                                                                          |
|   +-------------------+      +-------------------+      +------------+   |
|   | 1. Disassemble    | ---> | 2. Spindle & Post | ---> | 3. Secure  |   |
|   |    Old Latch Set  |      |    Alignment      |      |    Escutcheon|
|   +-------------------+      +-------------------+      +------------+   |
|                                                                |         |
|                                                                v         |
|                              +-------------------+      +------------+   |
|                              | 5. Closer Speed   | <--- | 4. Strike  |   |
|                              |    Calibration    |      |    Catch Adjustment
|                              +-------------------+      +------------+   |
+--------------------------------------------------------------------------+
Step 1: Hardware Removal and Hole Clean-Out
Unscrew the interior paddle plate and slide the exterior handle out from the door. Clean away trapped grime, rust, and old caulking from the mounting holes using rubbing alcohol and a microfiber cloth.
Step 2: Spindle Sizing and Insertion
Insert the square steel drive spindle through the central latch hub. Most replacement kits include variable-length spindles; ensure the spindle extends roughly 1/2 inch beyond the interior door face so it fully engages the interior lever or paddle without binding against the lock casing.
Step 3: Installing the Escutcheon Plate and Mounting Screws
Place the exterior handle plate against the door, feeding the threaded posts through the pre-drilled holes. Fasten the interior plate securely using hand screwdrivers. Avoid using high-torque cordless drills here, as over-tightening can crush hollow aluminum door frames!
Step 4: Calibrating the Jam Strike Catch
Position the metal strike box on the door frame jamb. Adjust its horizontal position so the latch bolt slides smoothly into the catch pocket when the pneumatic door closer pulls the door shut.
Expert Advice: Hidden Pitfalls to Avoid
Even seasoned handymen can run into operational snags if they ignore door alignment and thermal dynamics. Keep these field warnings in mind:
Hidden Pitfall 1: Forgetting Door-Closer Tension Calibration
A brand-new, high-end storm door handle will not catch properly if your pneumatic door closer is misaligned! If the closer arm slams the door too fast, the spring latch bounces off the strike plate; if it closes too slowly, the latch fails to fully depress into the catch pocket. Always adjust the tension screw on your pneumatic closer cylinder after installing new latch hardware.
Hidden Pitfall 2: Thermal Expansion Binding on South-Facing Glass
Full-view glass storm doors facing South or West generate extreme heat buildup trapped between the storm door and primary door (temperatures can exceed 160°F on sunny summer days!). Inferior plastic or low-grade die-cast internal gears expand under this thermal stress, causing the handle to stick or seize. Always select forged brass or high-grade powder-coated zinc handles for sun-drenched entryways.
Elevate Your Home’s First Impression
Upgrading your home’s exterior access points isn’t just about security—it’s about building architectural harmony across every detail. Swapping out a noisy, pitted latch for a sleek, ergonomic storm door handle restores effortless function while instantly unifying your entry hardware with modern curb appeal.