Vertical Asset Logistics: Maximizing Space with the Tire Storage Wall
September 30, 2026
No Comments
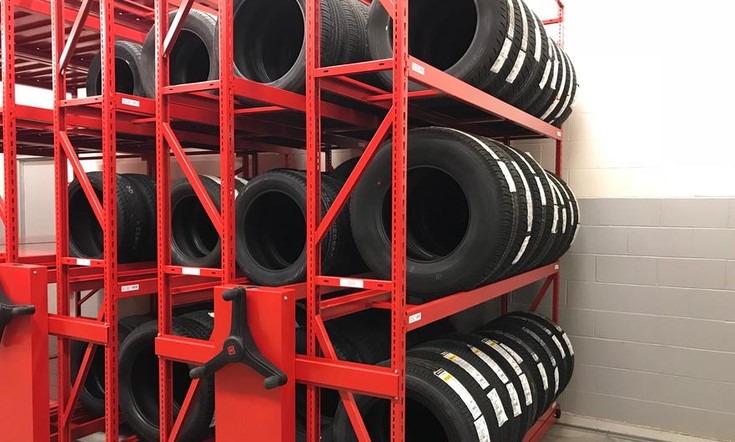
Source:https://www.montel.com
A couple of autumns ago, I helped a client reorganize a detached two-car garage that felt more like an obstacle course than a functional workspace. The main culprit wasn’t a collection of lawnmowers or power tools; it was two complete off-season sets of heavy winter tires sitting in precarious, dirty stacks right in the middle of the floor bay. Every time they tried to park, they had to squeeze out of the driver’s door at an awkward angle just to avoid scuffing their clothes on black rubber soot.
That afternoon, we lifted those eight heavy wheels off the concrete floor and mounted them onto a heavy-duty wall rack system. In under two hours, we reclaimed nearly 16 square feet of floor real estate and eliminated a massive tripping hazard.
Throughout my ten-plus years in structural home improvement and garage layout optimization, I have watched vehicle owners treat off-season wheels like temporary clutter. The reality is that deploying a dedicated Tire Storage Wall is a high-yield spatial intervention. It transforms unutilized vertical elevation into organized storage while protecting expensive rubber compounds from premature degradation.
The Physics of Rubber Storage: Why Floor Stacks Fail
Storing tires flat on a damp concrete garage floor or leaning them loosely against a drywall panel is more than just an aesthetic issue—it physically damages the tire assembly.
Think of a tire like a dense, heavy rubber cushion filled with steel belts and synthetic polymers. When a 50-pound tire sits flat on concrete for six months, gravity concentrates constant downward pressure onto a single static contact patch.
+-------------------------------------------------------------+
|                 TIRE STORAGE DEGRADATION MATRIX             |
+-------------------------------------------------------------+
| Storage Method    | Floor Flat Stacking | Tire Storage Wall |
+-------------------+---------------------+-------------------+
| Contact Pressure  | Uneven / High Base  | Suspended Tread   |
| Flat-Spotting Risk| High (Static Weight)| Minimal / Zero    |
| Moisture Intake   | High (Concrete Rim) | Low (Elevated)    |
| Floor Footprint   | Loss of 8-16 Sq Ft  | ZERO Sq Ft        |
+-------------------+---------------------+-------------------+
Preventing Flat-Spotting and Chemical Breakdown
-
Static Flat-Spotting: Continuous pressure on unmounted tires compresses the internal steel belting, creating flat spots that cause annoying steering wheel vibrations once reinstalled on your vehicle.
-
Chemical Migration: Raw concrete floors draw moisture through capillary action and often contain trace amounts of oil, road salt, and solvent residue. Direct rubber-to-concrete contact degrades elastomeric compounds, accelerating sidewall dry rot and cracking.
Structural Engineering: Joists, Studs, and Load Calculations
Hanging four mounted wheels and aluminum rims onto a vertical wall requires serious consideration of structural engineering. Four truck wheels can easily exceed 200 to 240 pounds of dead weight.
       [ WALL FRAMING ARCHITECTURE ]
                     │
        ┌────────────┴────────────┐
        ▼                         ▼
[ 2x4 Wood Studs ]        [ Metal / Masonry ]
        │                         │
        ▼                         ▼
 Center Pilot Drilling     Heavy Sleeve Anchors /
 (3" x 5/16" Lag Screws)  Expansion Fasteners
Dynamic Shear vs. Tensile Pull-Out Force
When you load heavy wheels onto an elevated wall rack, the installation creates two simultaneous mechanical forces:
-
Shear Force: The downward gravitational pull trying to slide the mounting brackets down the wall face.
-
Tensile Pull-Out Force: The outward lever arm leverage trying to pull the top fasteners horizontally out of the wall studs.
+-------------------------------------------------------------+
|                  FASTENER SPECIFICATION GUIDE               |
+-------------------------------------------------------------+
| Substrate Type    | Fastener Selection  | Minimum Penetration|
+-------------------+---------------------+-------------------+
| 2x4 / 2x6 Wood    | 5/16" Structural    | 2.5 Inches into   |
| Wall Studs        | Lag Screws          | Solid Wood Center |
| Concrete Block /  | 3/8" Sleeve Anchors | 2.0 Inches into   |
| Pour Masonry      | or Tapcons          | Solid Masonry     |
+-------------------+---------------------+-------------------+
Selecting the Right Tire Storage Wall System
Choosing the correct hardware depends on your specific vehicle wheel sizes, overall budget, and garage layout.
       [ TIRE STORAGE WALL ARCHITECTURE ]
                       │
        ┌──────────────┴──────────────┐
        ▼                             ▼
[ Fixed Tubular Racks ]     [ Telescoping / Adjustable ]
        │                             │
        ▼                             ▼
 Welded Heavy Steel Framing   Width-Adjustable Crossbars
 (Maximum Mass Capacity)       (Adapts to 14"-22" Wheel Sets)
Fixed Heavy-Gauge Steel Frames
These feature rigid, welded triangular support arms constructed from square-tubing steel. They are ideal for heavy commercial van, SUV, or truck wheel assemblies that require maximum static weight ratings (up to 400 lbs).
Telescoping Adjustable Racks
Telescoping racks use overlapping inner and outer steel bars that slide horizontally. This lets you adjust the internal width of your Tire Storage Wall setup from 32 inches up to 48 or 60 inches, accommodating everything from narrow sports car tires to wide off-road treads.
Step-by-Step Installation Protocols
A wall-mounted rack is only as safe as its anchor points. Follow this professional installation guide to secure your rack safely.
+-------------------------------------------------------------+
|                  INSTALLATION WORKFLOW                      |
+-------------------------------------------------------------+
| [ STEP 1 ] Locate Stud Centers with Deep-Scan Sensor        |
| [ STEP 2 ] Measure Vertical Door Clearance & Overhead Space |
| [ STEP 3 ] Pre-Drill Pilot Holes along Stud Centerlines     |
| [ STEP 4 ] Secure Brackets with Structural Lag Bolts        |
+-------------------------------------------------------------+
-
Locate and Mark Wall Studs: Use an electronic deep-scanning stud finder to locate the exact centerlines of two or three adjacent wall studs (typically spaced 16 or 24 inches apart on center).
-
Calculate Overhead Clearance: Measure the outer diameter of your tires. Position the bottom rail of your rack high enough so it clears hood lines or passing pedestrians, while leaving at least 4 to 6 inches of clearance below the ceiling.
-
Pre-Drill Pilot Holes: Drill pilot holes directly into the center of the wood studs using a 3/16-inch drill bit. Pre-drilling prevents dense framing lumber from splitting when driving heavy lag bolts.
-
Mount Support Brackets: Fasten the side support arms using 5/16 x 3-inch structural lag screws fitted with flat washers. Use a spirit level to verify that the support arms sit perfectly plumb before tightening all fasteners down.
Pro Tip: Before lifting your off-season wheel sets onto the wall, wash them thoroughly with a pH-neutral wheel cleaner to remove corrosive brake dust, road grime, and de-icing salts. Allow them to dry completely, then slip each wheel into a breathable canvas tire tote bag to prevent black rubber dust from transfer-staining your finished garage walls.
Hidden Warning: Never anchor a heavy tire rack exclusively into hollow drywall or OSB wall sheathing using toggle bolts, plastic anchors, or hollow wall anchors. The intense leverage of 200+ pounds extending 20 inches off the wall will tear drywall completely off the studs. Every primary structural bracket must be anchored directly into solid wood framing studs or solid masonry.
Long-Term Maintenance and System Audits
An elevated storage system requires minimal ongoing maintenance, but routine checks keep your garage safe.
-
Annual Fastener Audits: Every spring and fall during your seasonal wheel swap, use a socket wrench to check the tightness of all mounting lag screws and structural frame bolts.
-
Inspect Inflation Pressures: If storing tires mounted on rims, reduce air pressure to roughly 15–20 PSI during storage to relieve internal belt stress while preventing rim bead unseating.
Elevating Garage Logistics and Safety
Transforming an overcrowded, chaotic garage into a clean, functional workspace starts by utilizing underused vertical space. Installing a engineered Tire Storage Wall frees up valuable floor footprint, protects your investment in high-performance rubber, and brings professional organization to your home.
How do you currently store your off-season vehicle tires? Are they taking up floor space, or have you built an elevated storage setup? Share your garage projects, questions, or storage ideas in the comments section below!